How to Install a Wall-Mounted Mini Split ( Jaipur ,Rajathan )

How to Install a Wall-Mounted Mini Split
How Does a Mini Split Work?
It’s simple physics—heat will always transfer to cold. Using something called an inverter, the mini split is capable of capturing heat through a cold line of refrigerant and moving it to the desired location.
In the summer, the heat is extracted from the air in the house and dumped outside, making it cold. In the winter, heat is scavenged from the outside and pushed back into the house. This creates heating and cooling year-round.
Because there are no ducts to retrofit, the system is simple for a pro to install. And it provides excellent dehumidification, quiet operation, and great efficiency. Need to adjust the temperature or turn the unit off? Just use the remote control.
How Much Space Can a Mini Split Cool?
Steps for Installing a Mini Split
Every mini split installation needs the following criteria met:
- A location to mount the unit
- Access to electrical connections
- Access for a condenser outside
Step 1: Install the Condenser

This unit should go in a shaded location outside the house where it can have at least 4 inches of clearance behind it and 20 inches of clearance above it and in front of it. The 119-pound unit can be mounted on brackets fastened to the wall, as shown, or bolted to concrete blocks resting on the ground.
Step 2: Locate the Air Handler

It mounts on an exterior wall no more than 33 feet from the outdoor unit, at least 2⅛ inches below the ceiling and 3 feet from a TV. First, the mounting plate is screwed to the studs, as shown. At the plate’s lower-right corner, the installer drills through the wall with a 3-inch hole saw. Outside, a connecting hole is drilled ¼ inch below the one inside.
Step 3: Mount the Air Handler

With the cover off, the control wire, refrigerant lines, and condensate drain hose are attached to the unit and taped together, and a protective sleeve is fitted into the hole in the wall. The unit is hoisted up without its fins being touched, and the taped parts are fed through the sleeve, as shown. The unit then mounts to the plate.
Step 4: Set Up the Condenser
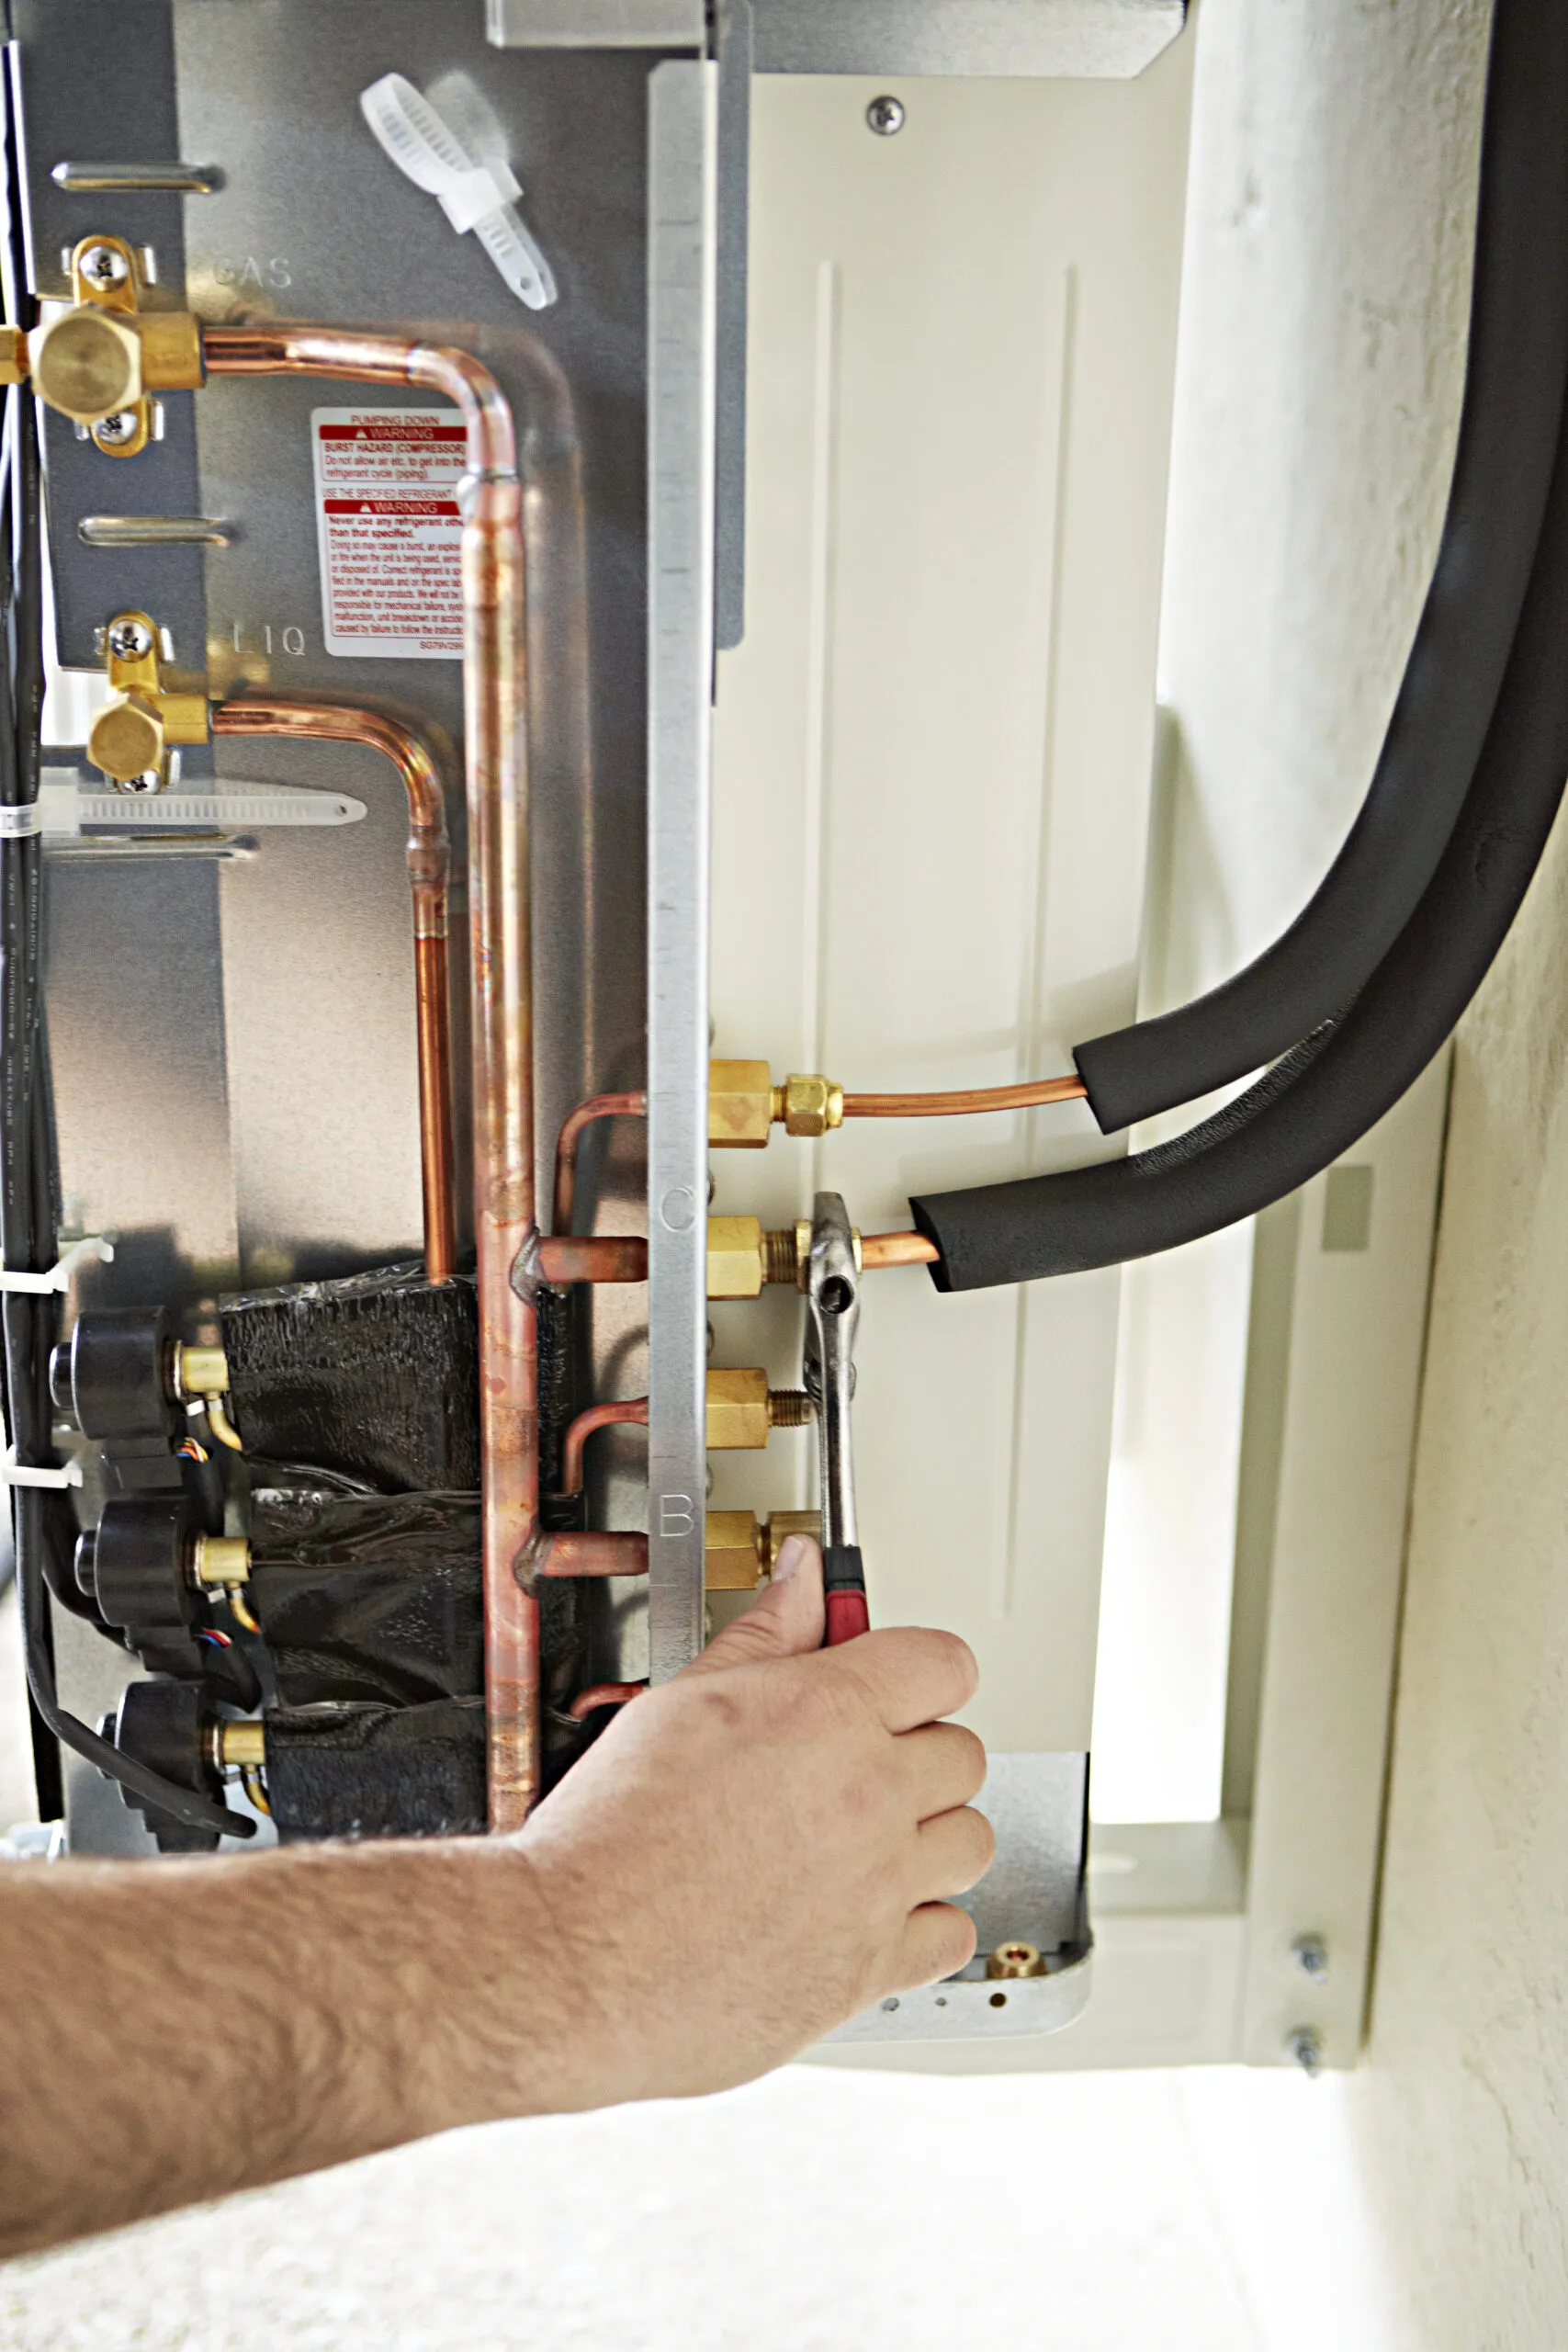
The outdoor unit is connected to the control wire from the indoor unit and to a jacketed power cable leading to the breaker panel. Then the ends of the refrigerant lines are fastened to the condenser with flare nuts, as shown. Flare nuts are also used to join these lines to the ones on the indoor unit.
Step 5: Hide the lines

A plastic channel screwed to the siding hides the lines, condensate hose, and control wire. After the hose is checked to make sure it drains freely, the end of the hole sleeve is sealed with silicone to prevent water infiltration. Then the channel is capped, as shown.
Step 6: Pump and Cover

A gauge manifold and a vacuum pump are hooked up to the refrigerant lines to detect leaks and dry the lines as refrigerant is pumped into them. The last step is to put the cover on the air handler, as shown. The system is then ready to heat and cool.
Comments
Post a Comment